
Introduction
Every morning, thousands of drivers skip their pre-trip inspection because they're in a hurry, they think nothing has changed since yesterday, or they simply forget. But here's what they don't realize: A pre-trip inspection is a systematic check every commercial vehicle driver must perform before beginning a journey. It's not just a recommended safety practice—it's a legal requirement under DOT and FMCSA regulations in the US and Canada. More importantly, skipping it is the #1 cause of roadside violations and costly breakdowns.
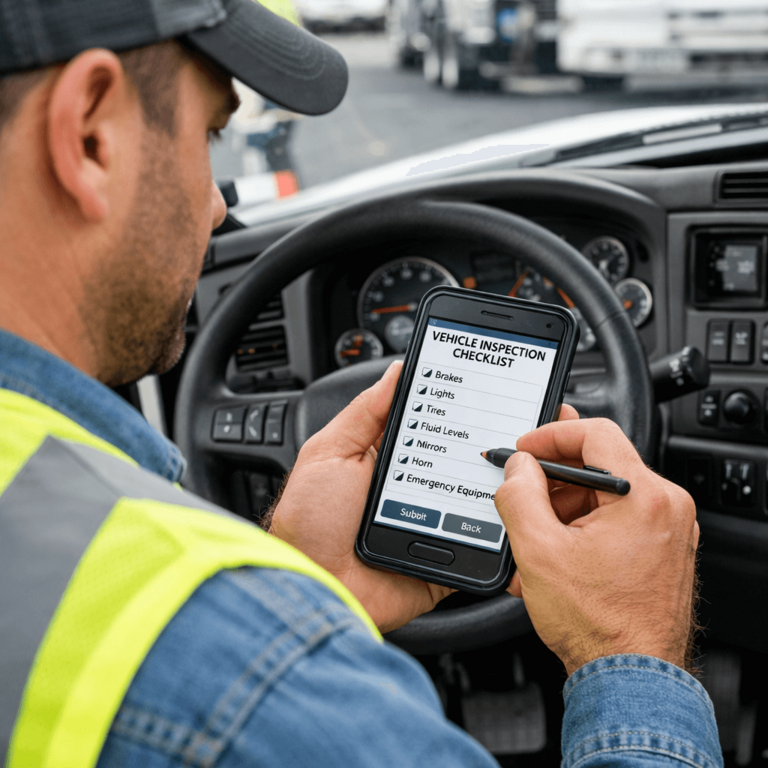
Quick pre-trip inspection checklist (at a glance):
- Brakes and brake lines
- Tires and wheels
- Lights and reflectors
- Mirrors and windshield
- Engine compartment and fluid levels
- Coupling devices
- Emergency equipment

In this article, we explain what a pre-trip inspection is, why it matters, and what risks arise when it’s skipped or done poorly.
What Is a Pre-Trip Inspection?
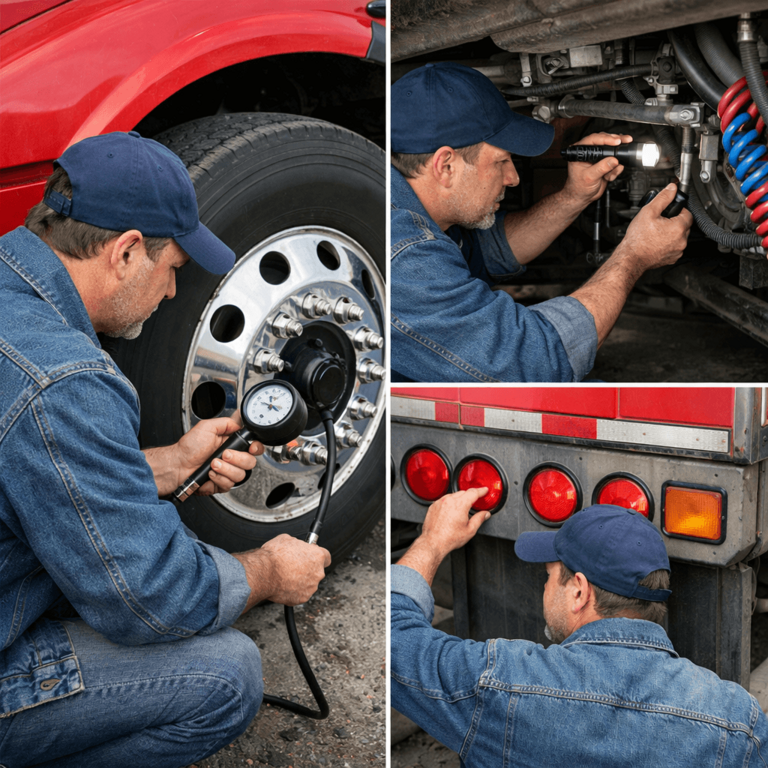
A pre-trip inspection is a comprehensive assessment of a commercial vehicle’s key systems and components performed before the day’s route begins. Drivers methodically check safety-critical items — including brakes, tires, lights, coupling devices, and more — and document the results in a Driver Vehicle Inspection Report (DVIR).
This documented inspection serves two purposes:
- Ensures vehicle safety for the driver and everyone else on the road
- Proves compliance with federal and state commercial vehicle regulations
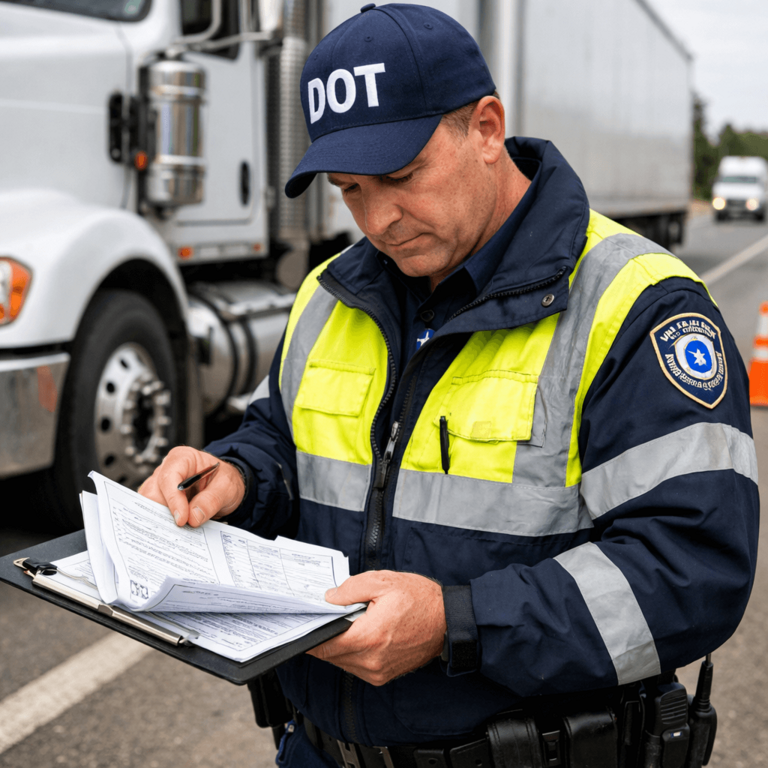
DVIRs are kept on file and may be requested during roadside inspections or compliance audits.
Purpose of Pre-Trip Inspections
The purpose of a pre-trip inspection goes beyond ticking boxes. Professional drivers perform these checks to:
1. Protect Driver Safety
Detecting safety issues like faulty brakes or worn tires before driving prevents dangerous breakdowns and accidents.
2. Maintain Regulatory Compliance
The FMCSA and other transportation authorities require inspections and documented DVIRs before operating a commercial motor vehicle. Drivers must follow checklists and report defects — and fleets must retain these reports for regulatory review.
3. Avoid Costly Repairs and Downtime
Identifying and addressing issues early reduces breakdown risk, minimizes roadside repairs, and avoids unplanned downtime.

4. Support Maintenance and Fleet Oversight
A consistent inspection routine keeps fleets in top condition and gives fleet managers actionable data for maintenance planning.
Common Risks Without Inspections
Skipping or rushing a pre-trip inspection can have serious consequences for safety, compliance, and fleet performance.
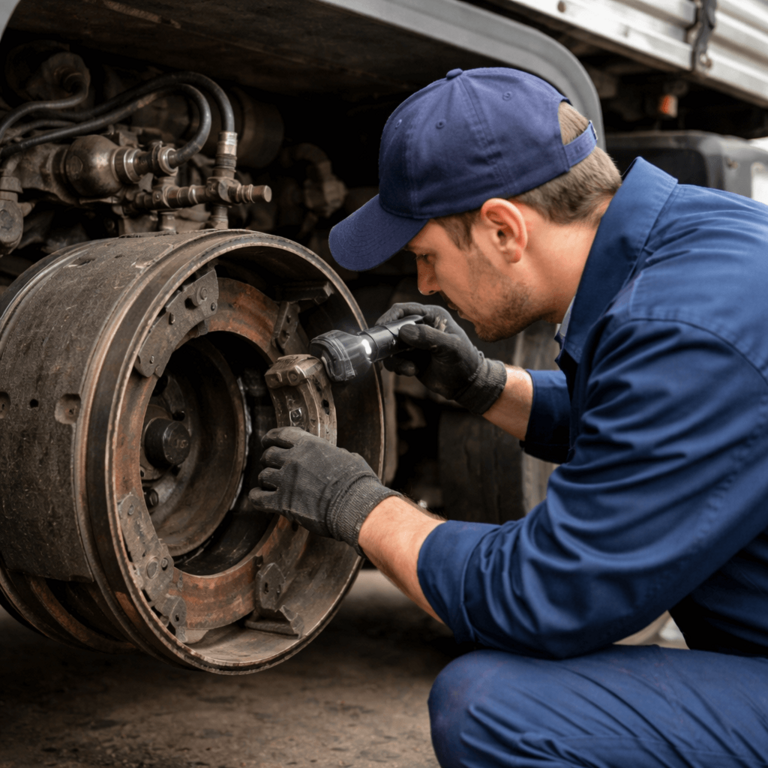
Brake Failure
Faulty brakes are one of the most dangerous issues on the road. Brake failures contribute to collisions and costly insurance claims.
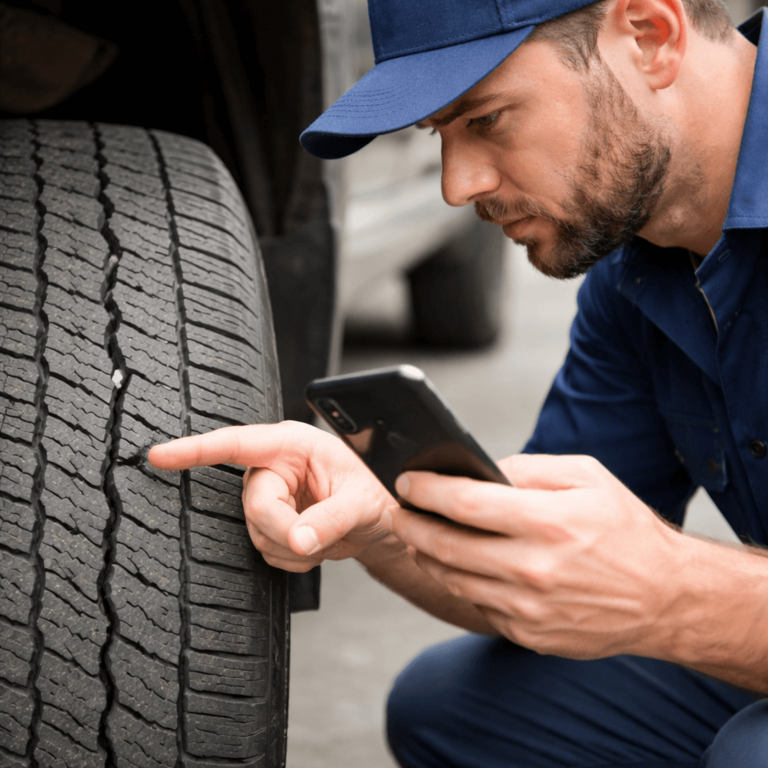
Tire Blowouts
Under-inflated, worn, or damaged tires dramatically increase the risk of blowouts at highway speeds.

DOT Violations
Non-compliance with inspection regulations can result in fines, out-of-service orders, and lower safety scores during DOT roadside checks.
Why Drivers Skip Pre-Trips (And What It Really Costs)
We asked 200 drivers why they sometimes skip pre-trip inspections. The top three answers: "I'm running late," "I checked it yesterday," and "Nothing ever changes." We get it—but here's what actually happens when drivers skip this step.
The Real Stories We've Heard:
- The $47,000 Tire Blowout: A driver in Arizona skipped his pre-trip because he was "only going 50 miles." He didn't notice a slow leak in his front tire. Twenty miles down the highway, the tire blew, causing a multi-vehicle accident. The insurance company denied the claim because there was no pre-trip inspection record showing the tire was checked. The fleet paid $47,000 out of pocket.
- The Missing Brake Line: A driver in Ontario did a "quick walk-around" but didn't check underneath. A brake line had been damaged the night before (probably by road debris). He made it 15 kilometers before the brakes failed at a red light. Luckily, no one was hurt, but the truck was totaled. The driver's insurance premium doubled, and the fleet lost a major contract because of the incident.
- The DOT Roadside Stop: A driver in Texas was pulled over for a routine inspection. The officer asked for that morning's pre-trip DVIR. The driver had skipped it. The officer issued a violation, placed the truck out of service, and the driver had to wait 4 hours for a tow truck. The load was late, the customer charged a $2,500 penalty, and the driver lost his bonus. Total cost: $3,200 for a 15-minute inspection that wasn't done.
- The CSA Score Death Spiral: One fleet in Michigan had three drivers skip pre-trips in one month. Their CSA score dropped from 45 to 62 (higher is worse). Insurance premiums went up $18,000 per year. They lost two contracts because clients require a CSA score under 50. It took them 8 months to recover—and they had to fire one of the drivers.
What We Tell Drivers: We know you're busy. We know you've checked this truck before. But here's the thing—defects happen overnight. A brake line can get damaged. A tire can develop a slow leak. A light can burn out. The 15 minutes you spend on a pre-trip could save your job, your bonus, or even prevent an accident. Digital DVIR apps make it faster (usually 5-7 minutes), and they won't let you skip steps. That's not annoying—that's protection.
Traffic Accidents
Vehicles with undetected defects are more likely to be involved in accidents — risking lives, cargo, and company reputation.

What is pencil whipping in fleet inspections?
Pencil whipping is when a commercial driver rapidly checks off safety boxes and signs a paper DVIR without actually performing the physical walk-around of the vehicle. This fraudulent practice conceals critical safety defects, dramatically increases the probability of roadside breakdowns, and serves as a primary trigger for severe DOT penalties and carrier liability.
Why do safety checks keep getting skipped or forgotten, and how does technology fix it?
Safety checks are skipped because drivers feel rushed, complacent, or overwhelmed by repetitive paperwork. Modern electronic pre-trip inspection software stops fake DVIRs with anti-pencil-whipping controls: mandatory photo capture of specific components, GPS geofencing to prove proximity to the asset, and minimum time-on-task guardrails. Together they make fabricating a full inspection physically impossible.
The 2026 CSA Scoring Impact: The financial consequences of pencil whipping have never been higher. FMCSA has updated the Compliance, Safety, Accountability (CSA) system by splitting the Vehicle Maintenance BASIC, placing double the penalty weight on "Driver-Observed" conditions. If a DOT inspector finds a defect at a roadside check that your driver should have caught during the morning pre-trip, the hit to your fleet's safety score is severe.
The Threat of Nuclear Verdicts: In a severe collision, plaintiff attorneys routinely exploit the unreliability of paper logs. If ELD telematics or dashcam data prove the truck was moving while a paper DVIR was allegedly being filled out, the pattern establishes systemic corporate negligence — a scenario that frequently culminates in "nuclear verdicts" with settlements exceeding $10 million. A time-stamped, photo-verified electronic DVIR system is a fleet's strongest legal shield against claims of spoliation of evidence or negligent maintenance.
What Drivers Commonly Inspect During a Pre-Trip Check
While checklists can vary by vehicle type or fleet policy, most inspections include:
- Brakes and brake lines
- Tires and wheels
- Lights and reflectors
- Mirrors and windshield
- Engine compartment
- Fluid levels
- Coupling devices
- Emergency equipment
These systematic checks help identify hazards early, ensure compliance, and protect everyone on the road.
Step-by-Step Pre-Trip Inspection Checklist (Detailed)
If you want a consistent process that holds up during audits and roadside checks, follow a repeatable routine. Many fleets train drivers to walk the vehicle the same way every time (for example: cab → front → passenger side → rear → driver side → cab).
1) Start with documentation and cab setup
- Verify registration/permits and required documents are present
- Adjust seat, mirrors, and ensure clear windshield visibility
- Check warning lights and gauges during startup
2) Engine compartment and fluid levels
- Inspect for leaks (oil, coolant, fuel)
- Check oil, coolant, power steering, washer fluid as applicable
- Look for loose belts/hoses and damaged wiring
3) Brakes, tires, and wheels
- Inspect brake components you can see (lines/hoses, air leaks, obvious damage)
- Check tire condition (tread, cuts, bulges), and verify inflation per fleet policy
- Confirm lug nuts and rims show no cracks or missing hardware
4) Lights, reflectors, and signals
- Test headlights, turn signals, brake lights, and hazards
- Confirm reflectors/markers are clean and visible
5) Trailer, coupling devices, and load safety
- Inspect fifth wheel/coupler connections and safety chains where applicable
- Check airlines/electrical connections for wear and secure fit
- Verify doors, straps, and load securement (if applicable)
6) Emergency equipment
- Confirm triangles, fire extinguisher, and other required items are present and accessible
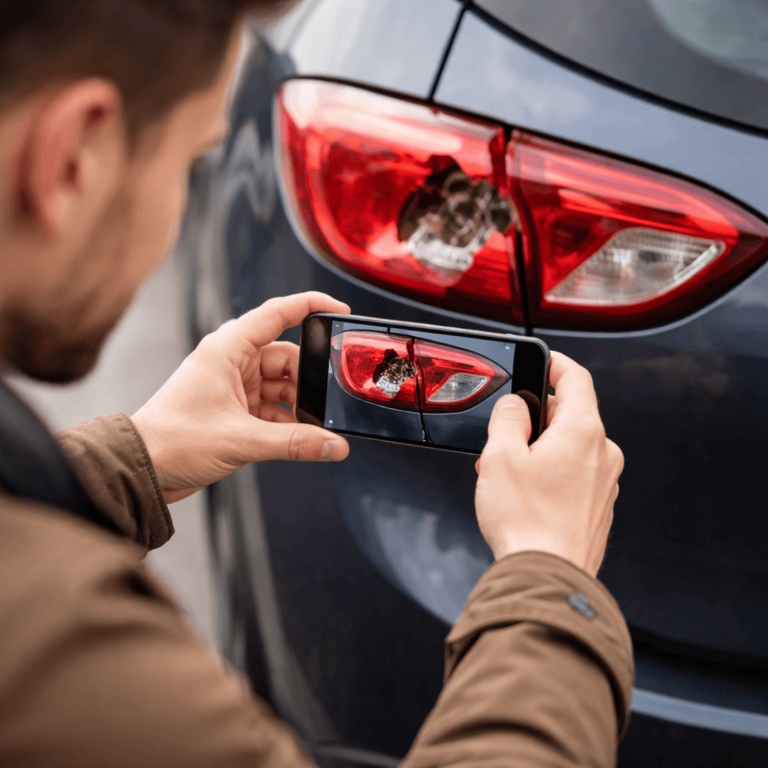
Tip: If you find a defect, document it clearly (what/where/how severe) and report it immediately. Photos help maintenance teams prioritize repairs and protect your compliance record.
Best Practices for Effective Pre-Trip Inspections
To make inspections thorough and consistent:
Use a Detailed Checklist
Follow the same procedure each time to avoid missing components.

Set Aside Enough Time
Rushed inspections are incomplete. Allow sufficient time — not less than 20–30 minutes for heavy vehicles.
Avoid Common Pre-Trip Inspection Mistakes
- Skipping the same area every day (use a consistent walk-around route)
- Only checking tires visually (missed low pressure or sidewall damage)
- Not verifying all lights and signals
- Failing to document “minor” defects that become major later
Document Defects with Photos
Visual documentation strengthens reports and supports maintenance teams.
Use Digital Tools for Reporting
Modern pre-trip inspection tools (such as DVIR software) automate reporting and simplify audit compliance.
For a deeper look at digital DVIR workflows and audit-ready reporting, read our guide: Pre-Trip Inspection DVIR Software: The Complete Guide.
If you want to reduce paperwork and create audit-ready records, start your trial here: Start a 15-Day Free Trial.
Stop Pencil Whipping. Protect Your Fleet.
PTI4YOU enforces photo evidence, GPS geofencing, and timestamped workflows so every DVIR is actually performed — not fabricated. Eliminate spoliation risk and keep your CSA scores clean.
Conclusion
A pre-trip inspection is far more than a routine task — it’s a critical safety and compliance practice for drivers of commercial vehicles. By performing thorough inspections, documenting findings, and reporting defects properly, drivers help protect themselves, their fleets, and everyone else on the road.
With digital tools and systematic processes, pre-trip inspections are easier, faster, and more reliable than ever — making them a cornerstone of professional fleet operations.
Frequently Asked Questions
What is a pre-trip inspection?
A pre-trip inspection is a systematic safety check performed before operating a commercial vehicle. Drivers inspect safety-critical components and record results in a DVIR.
Why is a pre-trip inspection important?
It improves safety, supports DOT/FMCSA compliance, reduces breakdown risk, and provides documentation for audits and roadside checks.
What happens if drivers skip a pre-trip inspection?
Skipping inspections increases the chance of undetected defects, which can lead to DOT violations, out-of-service orders, costly downtime, and accidents.
How long should a pre-trip inspection take?
For many commercial vehicles, a thorough inspection often takes around 15–30 minutes depending on equipment type and fleet policy. Rushing increases the risk of missed defects.
Do drivers need to complete a DVIR for every day or every trip?
Requirements vary by operation and jurisdiction, but drivers must document inspections and defects according to applicable DOT/FMCSA rules and fleet policy. Digital DVIR tools help ensure inspections are recorded consistently and are easy to retrieve for audits.